Showing posts with label Japanese. Show all posts

Tuesday, October 26, 2021

Kabocha Croquettes

Crisp outside, sweet and savoy inside. Those croquettes are perfect fall season appetizers. Kabocha is an Asian variety of winter squash. It is also commonly called Japanese pumpkin. I adapted from a recipe from Just One Cookbook. I used a whole Kabocha and made about 3 dozen croquettes. 

Ingredients

Kabocha - 1 medium size, about 2-3 lb
Bacon - 6 slices or to taste (I used a whole pack :-)
Onion - 1, minced
Unsalted butter - 1 TBSP
Salt - 1 tsp, or to taste
Freshly ground black pepper - 1/2 tsp, or to taste
[For Breading]
All-purpose flour - 1 cup
Buttermilk - 1 cup (made with 1 cup milk + 2 TBSP lemon juice)
Panko - 2 cups or more
[For Deep-frying]
Vegetable oil - 3 cups or more, depends on pot size

Steps

1. Remove seeds and pith from the kabocha and cut into big chunks. Steam kabocha for 20 minutes or until tender (enough that you can mash with fork). Remove the kabocha from the pot and transfer to a bowl. Let it cool until you can touch (but still warm). Remove the skin and mash with a fork.
2. While steaming the kabocha, mince the onion, cut the bacon into small bits. Heat the butter in a large frying pan over medium heat. Add the onion and sauté for 2-3 minutes, and add the bacon. Cook until the onion is translucent, tender, and nicely brown. Set aside.
3. Add the onion and bacon mixture to the mashed kabocha. Do not add the excess oil, which could make the mixture too wet. Season with salt and pepper to taste. Combine well together. 
4. Using a cookie scoop (I used a tablespoon), scope batter into ball shape (No worry if it is not perfect round). Cover with plastic wrap and refrigerate for 15 minutes so the balls become firmer. 
5. After 15 minutes, the balls are much easier to handle. Coat kabocha balls in flour and roll them to be more rounded. Put them back to fridge for another 15 minutes. During this time, the flour absorbs moisture. As a result, it will be less splatter in oil and the batter becomes sticker and won’t come off while deep frying.
6. For each ball, coat with buttermilk, and then panko. Cover with plastic wrap and rest in the refrigerator for another 15 minutes. 
7. Heat oil to 340ºF (170ºC) in a pot. Insert the long chopsticks, and when you see small bubbles appear around them, it’s ready to deep fry the croquette. The filling of the croquette is cooked already, so all you need is to fry the coating until golden brown. 
8. Transfer golden kabocha croquette to a wire rack or a plate lined with paper towel. Optionally, sprinkle some salt such as sea salt or Himalayan pink salt. 

Once it’s cooled completely, you can put the leftovers in an airtight container and store in the refrigerator for 3 days and in the freezer for up to a month. To serve again, reheat with air fryer for 3-5 minutes.

Thursday, May 7, 2020

Japanese Soufflé Pancakes

Gram cafe & Pancake just opened in San Francisco and they are famous for their premium soufflé pancakes. So I found the recipe online to try.

Ingredients

Eggs - 4 large
Whole milk - 3  Tbsp
Pure vanilla extract - ½ tsp
Cake flour - ½ cup
Baking powder - 1 tsp
Sugar - 4 Tbsp
Vegetable oil - 2 Tbsp, for greasing the pan
Water - 4 Tbsp, for steaming
Toppings & Fillings
powder sugar - 2 Tbsp
Fresh berries
maple syrup
Whipped cream

Steps

1. Gather all the ingredients. You will also need a 12-inch non-stick frying pan (large enough to cook 3 pancakes at the same time) with a lid.
2. Separate egg whites and egg yolks into two different bowls. Put the bowl with egg whites in the freezer for 15 minutes. 
3. In the meantime, add milk and vanilla to the egg yolks and whisk until thick and frothy. Sift the cake flour and baking powder into the bowl. Whisk to combine thoroughly (but do not over-mix). Set aside.
4. After 15 minutes, take out the bowl with egg whites from the freezer. The egg whites should be half frozen. Now start beating egg whites. When the egg whites turn frothy and pale white, gradually add in sugar (roughly ⅓ at a time). Continue to whip the egg whites. The egg whites will become glossier and firmer. Stop beating when you lift up the hand mixer and the egg whites stand right up with stiff peaks slightly bending over.
5. Heat the large non-stick frying pan over the lowest heat. Brush with cooking oil and lightly remove any visible oil (otherwise the pancakes will have a spotty pattern). Keep the heat on while you combine egg whites and egg yolk mixture.
6. Take ⅓ of egg whites and add to the egg yolk mixture. Whisk together. Next, take half of the egg whites and add to the egg yolk mixture. Using a whisk, gently fold in without breaking the air bubbles in the egg whites.  Now transfer the egg yolk mixture into egg whites. Carefully fold in two mixtures together without breaking the air bubbles. Make sure to gently mix the batter thoroughly!
7. Since I was not skillful enough to do this freehand. I used a mousse ring lined with parchment paper to help cooking the pancake. Place the rings on the frying pan, and then scoop the batter to make a tall pancake. Set timer for 6-7 minutes, add 1 Tbsp water in empty spaces inside the pan and cover with the lid. Water keeps the pancake moist. 
8. After 6-7 minutes passed, remove the rings and parchment paper, flip the pancake VERY GENTLY. Add water in empty spaces, cover the pan, and set a timer for 4 to 5 minutes to cook the other side on the lowest heat.
9. Once they are nicely browned, transfer the pancakes to your serving plates. Place fresh cream on the pancakes and top with berries. Dust the pancake with confectioners’ sugar and drizzle with maple syrup. Enjoy!

Sunday, April 19, 2020

Matcha Pound Cake

I liked the Matcha pound cake from Starbucks Japan. So when I saw this recipe,  I was happy to try. The loaf was baked just right with crust outside and soft center. This is pound cake, Japanese style, which means is it not very sweet and buttery.

Ingredients

Eggs - 4
Cream of tartar - 1/4 tsp (optional, I did not use)
Sugar - 1/4 + 1/2 cup
Butter - 10 TBSP, at room temperature
Whole milk - 3 TBSP
Vanilla extract - 1 tsp
All purpose flour - 1 C + 2 T
Cornstarch - 2 TBSP
Matcha powder - 1 TBSP
Baking powder - 3/4 tsp

Steps

1. Preheat oven to 350°F. Line a 8 x 4″ loaf pan with parchment paper.
2. Use a stand mixer with whisk attachment to beat egg whites until foamy. Add in the cream of tartar and keep beating. Gradually add in the 1/4 cup of sugar and whip until stiff peaks. Transfer whipped egg whites to a large clean bowl. Set aside.
3. In the same mixing bowl, change to paddle attachment to cream butter and sugar until light and fluffy, about 2-3 minutes. Gradually add in the egg yolks one by one, and then add the milk and vanilla extract. Mix until combined.
4. Remove the mixing bowl and sift in about 1/3 the dry ingredients (flour, cornstarch, matcha, and baking powder) and alternate with 1/3 the egg white mixture, repeating until everything is combined together.
5. Transfer the cake batter to the lined loaf pan. Carefully bang the pan to release any trapped air bubbles.
6. Bake for 60-65 mins, until golden brown on top, or until a toothpick inserted comes out clean. Let cool completely before slicing.
Note: Sliced cake can be individually wrapped in plastic wrap and frozen for up to 2 months. Just remove from the freezer about 15-20 minutes and leave at room temperature before serving.

Monday, April 6, 2020

Hand Towel Wagashi (茶巾絞り)

Those wagashi traditionally was made with hand towels. Now people mostly use paper towel or plastic wrap. The pastry is made using purple yam paste with red bean filling.

Thursday, November 14, 2019

Japanese Cheesecake (日式乳酪蛋糕)

The Japanese Cheesecake is light and cotton soft, people will love it even if they do not like cheese at all. Making it is a little bit tricky. The successful Japanese cheesecake should have a nice dome on top that is smooth and not cracked, with a velvet soft texture. It takes a lot of trials and errors. Here is the best reading about how to make Japanese Cheesecake successfully. For the recipe, I adapted from Diana's Desert since a block of cream cheese is 8 oz in America.

Ingredients

Cream cheese - 1 block, 8 oz
Milk - 1/2 cup
Butter - 1/4 cup
Egg - 6
Cake flour - 60 g
Corn starch - 20 g
Lemon juice - 1 TBSP
Granulated sugar - 140 g
Cream of tartar  - 1/4 tsp(optional)

Steps

1. Separate the eggs into egg whites and egg yolks.
2. Melt cream cheese, butter and milk over a double boiler. Cool the mixture, then fold in the flour, the cornflour, egg yolks, lemon juice and mix well. 
3. Whisk egg whites with cream of tartar, and sugar until soft peaks form.
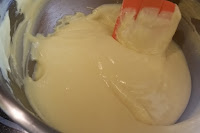
4. Take 1/3 meringue and fold into the cheese mixture, then fold in another 1/3 of meringue. After incorporated, pour the batter back to the remaining 1/3 meringue and fold gently.
5. Well grease a 10" cake pan, and line the bottom with parchment paper. Pour the batter in cake pan. Or prepare two 6" cake pan, and split the batter. 
6. Bake the cheesecake is tricky. My current procedure is to split the cake into two 6" cake pan, each of sit in a water bath with a 9" cake pan. 
a. Preheat the oven to 390°F. Place a pan with hot water a the bottom most shelf. Bake for 15 minutes. 
b. Adjust oven temperature to 320°F, bake for 12 minutes.
c. Turn off oven, bake for 20 minute. 
d. Open the door of the oven slightly, wait for 10 mins.
e. Take out the cake, and set it top down on a parchment paper to cool down
7. Wrap the cake and put in refrigerator for 4+ hours before serve.  

Thursday, October 3, 2019

Easy Japanese Curry Lamb

A quick weekday dinner, thanks to the curry sauce mix.

Ingredients

Lamb -  2 lbs, could use Beef, chicken, shrimp
Vegetables - a couple of onion, a few carrots or potatoes, sliced
Water - 5 cups
Golden Curry Sauce Mix - half of the box

Steps

1. Stir fry meat and vegetables with oil in a large skillet on medium heat for approximately 5 minutes.
2. Add water and bring to boil. Reduce heat, cover and simmer until ingredients are tender, approximately 15 minutes.
3. Turn heat off, add sauce mix in the skillet. Stir until sauce are completely melted. Simmer for approximately 5 minutes.
4. Serve hot over rice or noodles.

Wednesday, September 18, 2019

Homemade “Panko“

Panko is a Japanese-style breadcrumb traditionally used as a coating for deep-fried foods. “The biggest difference between panko and standard breadcrumbs is that panko is made from bread without crusts. Panko’s crust-less bread is coarsely ground into airy, large flakes that give fried foods a light, crunchy coating. The flakes tend to stay crispier longer than standard breadcrumbs because they don’t absorb as much grease. ", according to Internet. Since I just need some crunchy crust for my baked Mac and Cheese without a grocery store run, this homemade recipe will do.

Ingredients

1 loaf white bread or other bread

Steps

1. Preheat oven to 300 degrees.
2. Remove the crusts from a loaf of bread.
3. Gently crumble it into coarse crumbs either with your hands, or a food processor.
4. Spread crumbs onto a cookie sheet.
5. Dry bread crumbs in the oven 7-10 minutes stirring after the first 5 minutes.
6. Cool completely and store a cool dry place for up to 3 months.

Wednesday, July 11, 2018

Honey Kasutera (Castella) Cake (蜂蜜长崎蛋糕)

Honey Kasutera (Honey Castella) is a popular Japanese dessert. It's essentially a sponge cake, raised solely by egg, with no butter or oil.
The cake is soft yet sightly spongy. Traditionally, it is baked in a bottomless wooden frame. Wood conducts heat slowly, which helps to bake the cake evenly. There is no wooden frame at local bakery store. This seems like a perfect situation for Engineers - create then solve their own problems. I specified the dimension, my coworker designed and built me a Castella cake frame.
After the first time in the oven, the wood warped. So we added some screws and it has been tested a few more times with no more issues.
There are many recipes online; I combined and adjusted them to fill my frame properly.

Ingredients

Large eggs - 5 (at room temperature)
Granulated sugar - 1/2cup + 1/3 cup
Bread flour -  1 and 1/3 cup
Honey - 1/4 cup + 1/2 TBSP
Warm water - 2 and 1/2 TBSP

For glazing: 
1 TBSP honey, diluted with ½ TBSP warm water

Steps

1. Cut parchment paper to line the baking frame and put it on a baking tray.
2. Preheat oven to 320°F.
3. Sift the bread flour with the sifter or a fine meshed strainer.
4. Add warm water to honey and whisk well.
5. Fit the mixer with the whisk attachment. Crack eggs into the bowl and vigorously whisk until combined and frothy.
6. Add sugar and beat the eggs and sugar on high speed (Speed 10) for 5 minutes. The volume of the beaten eggs will increase about 4 times. The texture will be thick and the color will be pale yellow. When you stop the mixer and lift the whisk attachment, the mixture should fall in ribbons.
7. Add the honey mixture into the egg mixture and whisk on low speed until combined, about 30 seconds.
8. Add the bread flour at three separate times: add 1/3 of the bread flour and whisk on low speed for 15 seconds, then add more flour and whisk for 15 seconds. Add the last remaining portion and whisk until just combined for about 1 minute. Do not overmix.
9. Pour the batter into the baking frame. Drop/bang the pan a couple of time to remove the air bubbles in the batter.
10. Bake on middle rack of oven for 60-70 minutes, or until golden brown and a skewer inserted in the center comes out clean.  
11. Mix the honey and warm water in a bowl and apply the honey mixture on top of the cake with a pastry brush.
12. Immediately wrap the cake with or without the frame with plastic wrap or bag to keep the moisture while it's hot . Store in the refrigerator overnight (at least 12 hours), keeping the top side facing down. This will help the cake have more fine and moist texture.
13. Peel parchment paper off cake. To serve, slice off the sides of the cake with a sharp bread knife and cut into thick slices.
To save for later, wrap individual pieces with plastic wrap and freeze up to a month or keep in fridge up to 5 days.