Showing posts with label Dim-sum. Show all posts

Saturday, January 6, 2024

Coconut Milk Jelly (椰奶冻)

 Easy desert for party. You can present it in different sizes and shapes, or serve it in a desert cup.

Ingredients

Coconut Milk - 1 can (typically 400 ml - about 1.7 cups)
Milk - 4 cups
Heavy cream (or evaporated milk) - 1 3/4 cups
Sugar - 1/3 to 1/2 cup
Gelatin - 1.25 oz
Finely shredded coconut - 2 cups

Steps

1. Sprinkle Gelatin powder in 2 cup of cold milk and let it bloom in a few minutes.
2. Mix all the ingredients in a sauce pot, cook until sugar and gelatin melt. Pour the mixture into a glass container or a container lined with parchment paper.
3. Put the container in refrigerator for 4 hours or overnight.
4. Take out the jelly and cut into shapes desired. Roll in fine shredded coconut to cover all sides. 
5. Keep refridgerated until ready to serve.

Vegan Potstickers (全素锅贴)

I tried to make vegan dumplings using this recipe. Like most Chinese cooking, the ingredients are for reference only. I did not follow it strictly either. It is all to your taste.

Ingredients

For the wrappers
All purpose flour - 3 1/2 cups
Tepid water - 1 cup + 2 TBSP
 (alternatively, you can just buy a package of pre-made dumpling wrappers):
For the filling
Oil - 3 TBSP + ¼ cup
Ginger - 1 TBSP, minced
Onion - 1 large, chopped
Fresh Shiitake mushrooms - 2 cups, chopped
Cabbage - 1 and 1/2 cups, finely shredded
Carrot - 1 and 1/2 cups, finely shredded
Chinese chives - 1 cup, finely chopped
White pepper - 1/2 tsp
Sesame oil - 2 tsp
Shaoxing wine (or dry sherry) - 3 TBSP
Soy sauce - 2 TBSP
Sugar - 1 tsp
salt (to taste)

Yield about 60 dumplings

Steps

1. Start by making the dough for the dumpling wrappers. Put the flour in a large mixing bowl. Gradually add the water to the flour and knead into a smooth dough. This process should take about 10 minutes. Cover with a damp cloth and let the dough rest for at least an hour.
2. In the meantime, make the filling. In a wok or large skillet over medium high heat, add 3 tablespoons oil and add the ginger. Cook for 30 seconds, until fragrant. Add the onions and stir-fry until translucent.
3. Add the chopped mushrooms and stir-fry for another 3-5 minutes, until the mushrooms are tender and any liquid released by the mushrooms has cooked off.
4. Add the cabbage and carrots and stir-fry for another 2 minutes, until the veggies are tender and all the liquid released has been cooked off. Transfer the vegetable mixture to a large mixing bowl and allow to cool.
4. To the bowl, add the chopped chives, white pepper, sesame oil, Shaoxing wine, soy sauce, and sugar. Season with salt to taste (though the soy sauce will usually add enough salt to the filling), and stir in the last 1/4 cup of oil.
5. To assemble the dumplings, cut the dough into small tablespoon-sized pieces. Roll each out into a circle, and pleat the dumplings (Here is a step-by-step photos on how to fold a dumpling, I simply squeeze it in shape). Continue assembling until you've run out of filling and/or dough.
6. To pan-fry, heat 2 tablespoons oil in a non-stick pan over medium high heat. Place the dumplings in the pan and allow to fry for 2 minutes. 
7. Pour a layer of water into the pan (about 1/4 of the dumplings height), cover, and reduce heat to medium-low. Allow dumplings to steam until the water has evaporated. 

8. Remove the cover, increase heat to medium-high and allow to fry for a few more minutes, until the bottoms of the dumplings are golden brown and crisp.

Wednesday, June 14, 2023

Shanghai Style Fried Rice Cake (上海油炸糍饭糕)

 This is a traditional Shanghai breakfast item. I basically followed this YouTube video.

Ingredients

Calrose rice - 3 cups
Water - 5 cups
Salt - 2 tsp
Yield 1/4 sheet of rice cake. Double for 1/2 baking sheet.

Steps

1. Rinse 3 cups of rice and add to rice cooker, add water to 5 cups mark. Cook rice. 
2. Put a layer of plastic wrap at the bottom of the baking sheet, scoop out rice and spread and press evenly. Cover with a layer of plastic wrap. I used double portion to fill a half sheet baking tray.
3. Put the tray in refrigerator overnight. 
4. Remove the wrap on top, brush with oil, and then flip the rice cake, brush the other side with oil. Slice into preferred size.
5. Put enough oil in a pot and heat it up to 320 - 350F (160-180C) and then deep fry each piece one by one until brown.
6. Serve warm.  

Tuesday, April 12, 2022

Mugwort Sticky Rice Ball (Green Rice Ball, 青团)

This is a traditional food to be consumed around Qingming festival, also known as Chinese Ancestors' Day. The rice ball is tinted green by mugwort. Mugwort is a flowering plant native to northern Europe, Asia, and parts of North America. The sage-colored plant is thought to prevent or treat health conditions like anxiety, digestion problems. The green color and refreshing taste is perfect to celebrate spring time.

Ingredients

Wheat starch (澄粉)- 90g
Boiling water - 150g
Glutinous rice flour (糯米粉) - 300g
Sugar - 45g
Oil - 15g, traditionally used lard
Mugwort Paste (艾草泥) - 270g
Red bean paste - 500g

Steps

1. I picked some Mugwort on a hike, only kept the young leaves, no stems. I collected about 75g worth. 
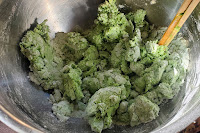
2.  Add washed Mugwort in a pot of boiling water, add 1/2 tsp baking soda, 1 tsp salt, and cook for about 3 min; then soak in cold water for about 5 minutes; after rinse a few times, blend the grass into paste using Vitamix. Add some water if needed. I ended up with about 270g of green paste. 
3. In a small bowl, add 150g boiling water into 90g of wheat starch, mix until paste turns half translucent. Cover and set aside. 
4. In another mixing bowl, mix glutinous rice water with sugar and oil, add green paste, and mix with a chopstick. Finally add the half cooked wheat starch, and knead into a dough. Cover and set aside to rest.
5. Portion the red bean paste into 28g each, and dough into 45g each. Make the rice ball by wrapping filling inside the dough. Steam on high heat for about 10 minutes. 
6. Coat the rice balls with olive oil while they are hot. You can wrap each ball with shrink wrap and it will keep fresh for 3 days in room temperature. Or you can freeze them for up to 1 month.

Friday, February 4, 2022

Layered Matcha and Red Bean Rice Cake(抹茶红豆年糕)

A pretty rice cake for Chinese New Year, following a YouTube video


Ingredients

Glutinous rice flour - 750g
Rice flour - 75g
Butter - 37g 
Sugar - 225g
Sweeten red bean (蜜红豆) - 150g
Matcha powder - 1.5 TBSP
Water - 300ml+375ml+ 270-300ml

Steps

1. In a sauce pot, add 300ml water, sugar and butter, heat up until the sugar is melt.
2. In a mixing bowl, mix the glutinous rice flour and rice flour, pour in the hot sugar water. Stir.
3. Mix in 375ml cold water
4. Prepare another 270-300ml cold water, slowly add in batches until the batter is well mixed and can flow freely.
5. Let the mixture rest for 30 minutes.
6. Preheat oven to 375F
7. Grease a 9"x13" glass baking dish with cooking spray
8. Pour out 2/3 batter to mix in matcha powder and mix well. 
 
9. Pour half of the Matcha batter in the baking dish. Bang the pan a few times to remove air bubbles. Water bath bake at 375F to 12-15 min. Cover the top of pan with aluminum foil during bake.
10. Pour more than half of the white batter in the pan. Use spatula to smooth the surface. Spread the red bean in, then add the remaining white batter. Use spatula to smooth. Water bath Bake 375F to 12-15 min
11. Pour the remaining Matcha batter in the pan. Use spatula to smooth the surface. Cover the pan with aluminum foil and then water bath bake 375F for 45 min-1 hour.
12. Let the cake cool completely and then slice and serve. Can keep it refrigerated until ready to serve.

Tuesday, December 28, 2021

Green Onion Pancake(葱油饼)

Green onion pancake is a Chinese staple dish. Every family does it a little differently. This method uses oil roux to make the pancake more crispy. 

Ingredients

Yields 4 large pancakes.
Dough
All-purpose flour - 2¼ cups 
Salt - ¼ tsp
Water - 1 cup, warm
Oil - 1 tsp
Roux
Vegetable oil - 3 TBSP 
All-purpose flour - 1/3 cup 
Salt - ¼ tsp
Additional Filling
2 bunches scallions (finely chopped, about 2 cups)

Steps

1. In a medium mixing bowl, mix flour, salt, and warm water with a wooden spoon or rubber spatula until a sticky dough forms. The dough should be sticky, but not wet. You can add up to 2 tablespoons more flour if you feel the dough is really wet.
2. Use a teaspoon of oil to coat the top of the dough round. Don’t worry about the dough sticking to the bowl for now. Cover with plastic wrap and let rest for 1 to 2 hours.
3. Combine all ingredients for the roux together in a bowl. Set aside.
4. After the dough has rested, use a teaspoon or two of oil to coat your work surface. Take the dough out and use a little more oil if you feel the dough is sticking to your hands or work surface. Is should be soft and pliable, and the oil keeps everything from sticking together.
5. Divide the dough into 4 equal pieces and roll each piece out lengthwise into a long strip. Next, take about ¼ of the roux, and spread it across the entire length of the dough with your hands. Take ½ cup of the chopped scallions, and spread them generously and evenly across the length of the dough.
6. Roll the dough, folding and tucking in the edges every so often so you don’t have any scallions leaking out of the sides. You end up with a little bundle of joy that you should set aside and cover with a piece of plastic wrap to avoid drying out. 
7. Repeat for the other three pancakes. At this point, you can also let the dough rest for 30 minutes to make rolling easier.
8. Place the dough ball with the spiral pattern facing up on your work surface. Flatten it with your hands or a rolling pin, so the dough round is about ¼-½-inch thick. 
8. Heat a cast iron pan over medium heat, and add 4 tablespoons of oil. Place the pancake in the pan. The pan should be hot enough so the dough is sizzling, but browning slowly. Move the dough around the oil to cook the sides of the pancake. When the bottom is slightly browned (about 2 minutes), turn the pancake over gently, being careful not to splash the oil. Turn it over if you think more browning is needed.
9. Transfer the scallion pancake to a preheated oven at 350F, and let bake for another 5 minutes for more crisping. 
10. Take the pancakes out of the oven and cut into wedges to serve. If you like, now’s the time to sprinkle some extra salt on top to taste.

Tuesday, March 30, 2021

Steamed Taro Cake(广式芋头糕)

Ingredients

Rice flour - 1 bag(1 lb)
Cantonese style sausage - 2 sticks
Dried shrimp - 1 cup
Green onion - optional
Salt
Oil 

Steps

1. Soak dried shrimp in water for a hour until soften.
2. Dice taro, sausage and dried shrimp.
3. Add rice flour to a mixing bowl, add enough water to knead into a dough.
4. In a frying pan, add oil and brown the sausage and shrimp.
5. In a frying pan, add oil and brown the taro, add salt to taste. 
6. Add enough water to immerse all taro pieces. Cook until boiling and then remove from heat. 
7. Add more water to the rice flour dough until it becomes a sticky batter, add salt to taste.
8. Pour taro with water into the rice flour batter, stir in sausage and shrimp.
9. Grease two 6" cake molds, and split batter between them. 
10. Steam on high heat for 35-40 minutes, or until chopstick inserted can come out clean. Optionally,  sprinkle with chopped green onion. 

11. Taro cake can be served hot as is, or you can slice and pan fried it with oil.